Motivation and Expectations:
I would like to share my experience and a bit of motivation for creating this blog. Recently I have been reading quite a few articles on HackerNews which are primarily intellectually stimulating and technical articles. Reading this inspired me this year to create a blog of my own. However, what has been holding me back is not wanting to get acquainted with a new CMS or the alternative, organizing pages and having to copy and paste them.
I expected to have to install tons of software or create some website with a poor wysiwyg online editor or have to write the HTML and CSS by hand. However, I have found that in 2022 creating this sort of blog is incredibly easy if you go the path that I have taken.
Stack Chosen:
I went with 11.ty for the static site generator because I am more familiar with the JS ecosystem and it had all the features that I could possibly want for this blog. For hosting, I considered github pages but I saw that Netlify had some great free hosting and url names.
With these two options, I can write a blog post in markdown, push or merge it to master, and netlify will take care of all of the build steps for me without having to fiddle with some wordpress on a Linux VPS as I have done in the past.
So without further ado, here are the steps that I used to create this blog.
How to Replicate:
-
Finding a base template for 11.ty:
For this I simply found a template that I liked the look of and thought would suit my needs. I found mine personally on the starter project page and went with eleventy-blog-mnml. There should be commands for you to run in the package.json file and in the README. I then forked this repo into my github account. This part is important for deployment later on.
-
Customizing for my needs:
For this I changed some of the scss files that I didn't like. For example, I didn't like that all of the words were lowercase so I found the scss file
styles\homepage.scssand changed the p styling. I also deleted the example posts and added my own favicon. -
Deployment to Netlify:
For this part I created an account at Netlify with my github credentials (be careful here, you should be able to restrict access to just your blog repo instead of the default all repos). I then created a new project with the import an existing project option. Be sure that your package.json settings match the build settings on netlify.
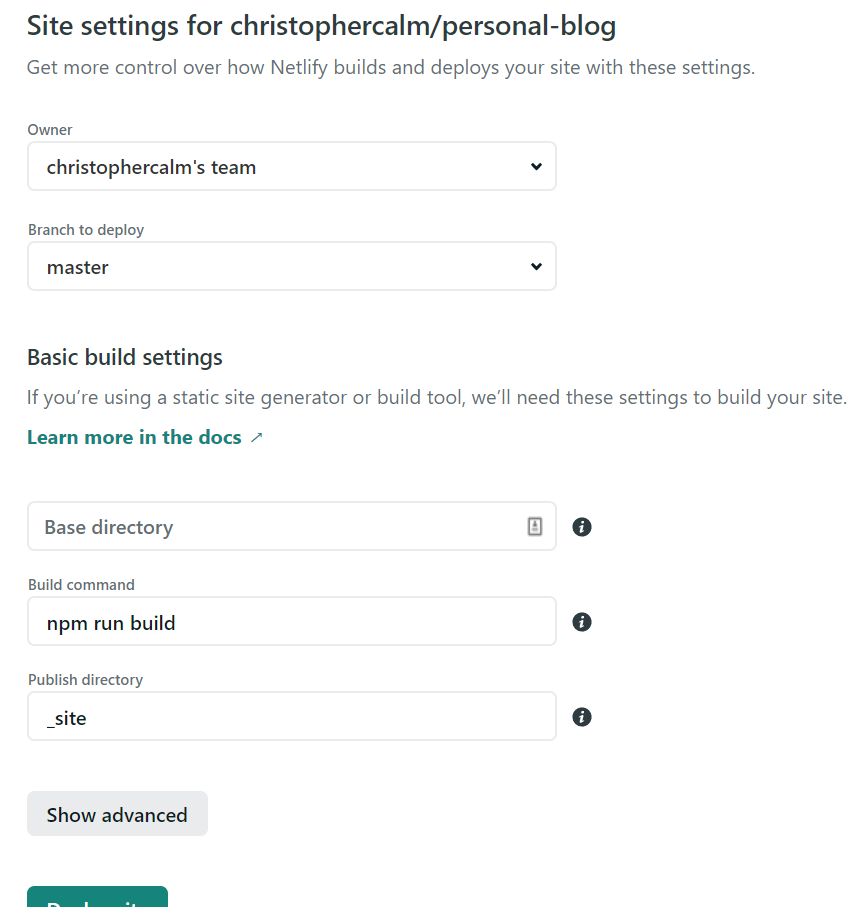
Mine were correct right out of the box. After that just click "deploy site" and you should be good to go if your post is in the branch that you set to deploy.
Conclusions:
Creating a blog in a dev friendly way where I have complete control of styling and content but don't have to mess with a bunch of apache or nginx settings has come a long way from when I first tried creating one in 2011 with a VPS and LAMP server with Wordpress. I have really enjoyed creating this blog and it only took me about an hour from start to finish once I had decided on a tech stack.
I appreciate the organic nature of a blog and I am really excited about the opportunities that I think that it will provide me.